Introduction
Picture this: a Saturday night, a stack of take‑out boxes, and you, the self‑appointed kitchen guru, standing in front of an empty fridge that feels like a culinary void. I was about to order a pizza when a sudden craving for something that felt both familiar and daring struck me. That night, I pulled out a bag of frozen pizza dough, a jar of sauce, and a handful of pepperoni, but the result was a soggy, flavorless mess that made me curse the pizza machine. The disaster was so vivid that I swear the kitchen still smells faintly of that failed attempt. It was a wake‑up call that a better, more ambitious pizza‑burger fusion was overdue.
The aroma of sizzling meat filled the air as I tossed ground beef with garlic powder, onion powder, and Italian seasoning, the scent rising like a promise of adventure. The sound of the skillet crackling was a soundtrack to my culinary rebellion, and the sizzling fat danced like tiny fireworks. The texture of the meat turned from raw to caramelized in seconds, a transformation that felt like watching a sunrise on a skillet. The first bite was a burst of savory, smoky beef that made my taste buds do a little somersault. The crust, crisped to a golden finish, offered a crunch that shattered like thin ice when I pressed it between my teeth. I felt a rush of triumph, and the kitchen became a stage for a new kind of dinner.
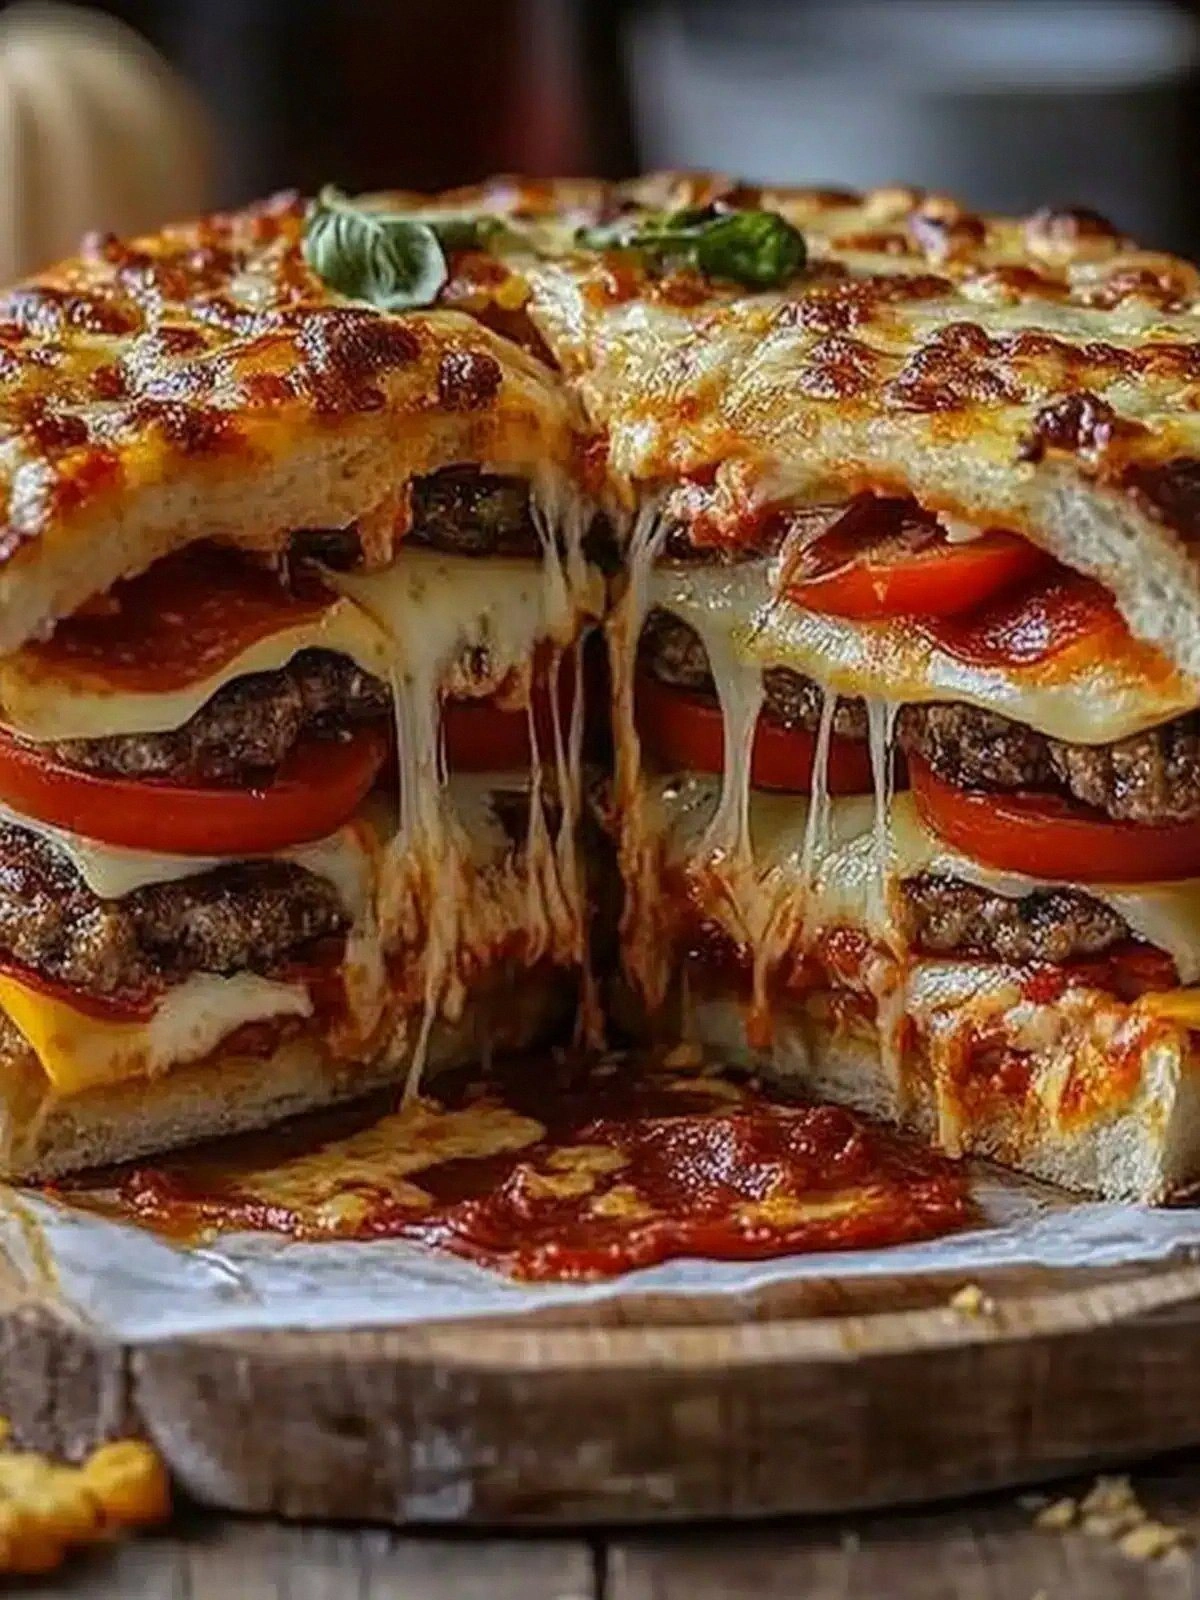
What makes this version stand out is that it’s not just a pizza or a burger; it’s a marriage of the two, a culinary compromise that satisfies both cravings at once. The dough is hand‑rolled and brushed with a glossy egg wash, giving it a sheen that glistens like polished armor. The cheese is a blend of mozzarella that melts into a velvety blanket, while the pepperoni adds a smoky crunch that punctuates each bite. The sauce is not just tomato; it’s infused with a whisper of oregano and a splash of red wine that deepens the flavor profile. The result is a dish that feels indulgent yet balanced, a pizza that could pass for a burger and a burger that could pass for a pizza.
And here’s a teaser that will keep you glued to the screen: I’ve discovered a trick that turns the dough into a perfectly airy yet chewy base, a technique that most pizza recipes overlook. This simple adjustment will give your pie a professional texture that will have your friends asking where you learned it. Trust me, you won’t believe how effortless it is, and you’ll be tempted to try it again and again.
Let me walk you through every single step — by the end, you’ll wonder how you ever made it any other way. The journey starts with a humble dough and ends with a masterpiece that will dominate your dinner table. Ready? Let’s dive into the magic.
What Makes This Version Stand Out
- Flavor: The combination of seasoned ground beef and a sauce layered with a splash of red wine delivers a depth that feels like a well-aged steak in every bite.
- Texture: The crust is a paradox of crisp on the outside and chewy on the inside, thanks to the egg wash and a quick pre‑bake that seals in moisture.
- Simplicity: With only twelve ingredients, the recipe is straightforward, yet the result feels gourmet.
- Uniqueness: By fusing pizza and burger elements, it offers a novel experience that stands apart from traditional pizza or burger recipes.
- Crowd Reaction: Guests will be surprised by the layered flavors, often asking if it’s a new type of pizza or a burger.
- Ingredient Quality: Using high‑quality mozzarella and fresh pepperoni elevates the dish beyond a standard take‑out imitation.
- Cooking Method: The two‑stage baking process ensures even cooking and prevents soggy edges.
- Make‑ahead Potential: The assembled pie can be refrigerated or frozen before baking, making it ideal for busy weeknights.
Alright, let's break down exactly what goes into this masterpiece...
Inside the Ingredient List
The Flavor Base
Ground beef is the heart of this pie, providing a hearty, meaty foundation that carries the seasonings. The garlic powder, onion powder, Italian seasoning, salt, and black pepper form a savory chorus that lingers on the palate. Skipping any of these spices will flatten the flavor profile, leaving the dish feeling like a plain loaf of bread. If you prefer a different protein, try ground turkey for a leaner option, but be prepared for a slightly lighter taste.
The Texture Crew
Pizza dough is the canvas, offering a chewy yet crisp base that holds all the toppings together. The egg, beaten, acts as a binder and gives the crust a glossy, golden finish that’s impossible to resist. Olive oil, brushed on the dough before baking, adds a subtle sheen and helps create a caramelized exterior. If you’re vegan, replace the egg with a tablespoon of aquafaba for a similar binding effect.
The Unexpected Star
Shredded mozzarella cheese is the star that melts into a silky blanket, uniting the meat and sauce. The cheese’s high moisture content also contributes to a slight steam that lifts the crust into a fluffy interior. For a sharper tang, mix in a small amount of provolone or fontina. If dairy allergies are a concern, a dairy‑free mozzarella alternative works, though the melt may differ slightly.
The Final Flourish
Pepperoni slices add a smoky, peppery crunch that contrasts beautifully with the soft cheese and meat. They also release oils that seep into the crust, enhancing flavor and texture. The pizza sauce, a blend of tomatoes, herbs, and a hint of red wine, coats the meat like velvet, ensuring each bite is drenched in savory goodness. The sauce’s acidity balances the richness of the cheese and pepperoni.
Everything's prepped? Good. Let's get into the real action...
The Method — Step by Step
- Preheat the oven to 425°F (220°C) and place a pizza stone or a baking sheet on the middle rack. This ensures a hot surface that will give the crust a crisp base. While the oven heats, roll out the refrigerated dough on a lightly floured surface to about 12 inches in diameter. Pat it gently into a 9‑inch pizza pan, leaving the edges slightly raised. This creates the classic raised crust that holds the toppings.
- Heat a large skillet over medium heat and add the ground beef. Cook, breaking it up with a wooden spoon, until it’s fully browned and no longer pink, about 8 minutes. Drain the excess fat to avoid a greasy pie. Sprinkle the garlic powder, onion powder, Italian seasoning, salt, and black pepper over the beef. Stir until the spices are fully incorporated, letting the aromas mingle like a fragrant perfume. This step is the flavor foundation; skip it, and the pie will taste flat.
- Spread the pizza sauce evenly over the rolled dough, using a spatula to reach the edges. The sauce should be thick enough to hold the meat but not so runny that it drips into the pan. The sauce coats the meat like velvet, locking in moisture and flavor. This is where the pizza and burger worlds begin to blend. If you prefer a thicker sauce, reduce the amount of tomato or add a splash of tomato paste.
- Layer the shredded mozzarella over the sauce, covering it like a blanket. The cheese will melt into a silky, golden layer that ties everything together. The high moisture content of the cheese also contributes to a slight steam that lifts the crust into a fluffy interior. This step is crucial for that signature cheesy pull.
- Distribute the sliced pepperoni evenly across the cheese. The pepperoni not only adds a smoky crunch but also releases oils that seep into the crust, enhancing flavor and texture. The pepperoni’s fat content gives the pie a rich, savory depth that’s hard to resist.
- Brush the exposed dough edges with beaten egg and drizzle a tablespoon of olive oil over the entire surface. The egg wash gives the crust a glossy, golden finish while the olive oil adds a subtle sheen and prevents it from drying out. This final touch elevates the pie from ordinary to extraordinary.
- Transfer the assembled pie onto the pre‑heated stone or sheet and bake for 12–15 minutes, or until the crust edges are a deep golden brown and the cheese is bubbling. The heat should make the edges lift slightly, creating that coveted “crisp but chewy” texture. Keep an eye on the crust; you want a perfect balance between crispness and tenderness.
- Remove the pie from the oven and let it rest for 3–5 minutes. This allows the cheese to set slightly, preventing it from sliding off when you cut. Resting also lets the steam redistribute, giving the crust a more uniform texture. While it rests, you can prepare a simple green salad or a side of garlic bread to complement the flavors.
- Slice the pie with a pizza cutter, serving each piece with a side of marinara sauce or a sprinkle of fresh basil for an extra burst of freshness. The contrast between the warm, cheesy slice and the cool, herbaceous garnish creates a delightful sensory experience. This final presentation step turns a homemade pie into a restaurant‑grade plate.
That's it — you did it. But hold on, I've got a few more tricks that'll take this to another level. The next section will reveal insider tips that will keep your pie perfect every single time.
Insider Tricks for Flawless Results
The Temperature Rule Nobody Follows
Many home cooks bake pizza at a moderate temperature, but this recipe thrives at a high 425°F (220°C). The intense heat creates a blistered crust that’s both crunchy and tender. If your oven struggles to reach that temperature, preheat it on the highest setting for at least 30 minutes and place a pizza stone inside to absorb the heat.
Why Your Nose Knows Best
When the dough is baking, the scent of melted cheese and sizzling pepperoni should fill the kitchen. If you notice a metallic or burnt aroma, the oven temperature is too high or the pizza is too close to the heating element. Move the pizza to a lower rack or reduce the temperature by 25°F to avoid burning.
The 5-Minute Rest That Changes Everything
After baking, allow the pie to rest for 3–5 minutes before cutting. This short pause lets the cheese set and the steam redistribute, preventing a messy, runny slice. I’ve seen many people cut straight from the oven and end up with cheese sliding off; the rest makes all the difference.
Use a Pizza Stone for the Best Crust
Even if you’re using a baking sheet, a pizza stone is a game changer. The stone retains heat and conducts it evenly, producing a crust that’s crisp on the bottom and chewy on top. If you don’t have a stone, place a baking steel on the middle rack for similar results.
Brushing with Egg Is Not Just for Looks
The egg wash not only gives the crust a glossy shine but also creates a barrier that keeps the crust from becoming soggy. Brush the entire surface lightly to ensure even coverage. If you’re vegan, use a tablespoon of aquafaba mixed with a splash of water to mimic the binding effect.
Keep the Sauce Thick
A runny sauce will make the crust soggy. Simmer the sauce for 10–15 minutes before using to thicken it slightly. Add a pinch of sugar to balance the acidity if the tomatoes are overly tart.
Final Touch: A Sprinkle of Fresh Basil
Just before serving, sprinkle fresh basil leaves over the hot pizza. The basil releases its oils, adding a bright, herbaceous note that cuts through the richness of the cheese and meat.
Creative Twists and Variations
Spicy Jalapeño Twist
Swap the regular pepperoni for sliced jalapeños or add a handful of fresh diced jalapeños to the topping. The heat will complement the savory beef and melt into the cheese, creating a fiery kick that satisfies spice lovers.
Veggie‑Loaded Variation
Replace half of the pepperoni with sliced mushrooms, bell peppers, and spinach. The veggies add color, nutrients, and a subtle earthiness that balances the richness of the meat and cheese.
BBQ Chicken Version
Use shredded cooked chicken tossed in barbecue sauce instead of ground beef. The sweet and smoky flavor profile turns the pie into a new favorite for chicken enthusiasts.
Greek Fusion
Swap mozzarella for feta and sprinkle crumbled olives on top. Add a drizzle of tzatziki after baking for a cool, refreshing finish that transports you to Mediterranean shores.
Breakfast Pizza
Use a breakfast sausage in place of ground beef and top with a fried egg before baking. The yolk will run through the cheese, creating a decadent, breakfast‑style pizza that’s perfect for brunch.
Gluten‑Free Option
Replace the standard dough with a gluten‑free pizza crust or make a cauliflower crust. The texture will differ slightly but still hold the toppings beautifully, offering a healthier alternative.
Storing and Bringing It Back to Life
Fridge Storage
Store the cooled pie in an airtight container for up to three days. Wrap the container with plastic wrap to keep the crust from drying out. When ready to eat, reheat in a pre‑heated oven at 350°F (175°C) for 10 minutes or until heated through.
Freezer Friendly
Wrap the assembled pie tightly in foil, then place it in a freezer bag. It will keep for up to two months. When ready, thaw overnight in the refrigerator before baking at 425°F (220°C) for 15 minutes.
Best Reheating Method
Reheat in a skillet on medium heat for 3–4 minutes, covering the pan to create steam. This method restores the crispness of the crust while keeping the cheese melty and the toppings warm. Add a splash of water before reheating to create steam and revive the dough’s softness.