Picture this: a Sunday afternoon, the kitchen smells like burnt toast, and your friend dares you to turn leftover mashed potatoes into something edible. I stared at the bowl of starchy mush, feeling the heat of the stove like a tiny furnace. My confidence was low, but the craving for something crispy and comforting was higher. That moment sparked a culinary rebellion, a mission to rescue the mash from culinary oblivion. By the end of the night, I had turned a disaster into a triumph that still makes my taste buds sing.
The air was thick with the aroma of buttery potatoes, a faint hint of salt, and a whisper of garlic from the sauté pan. My eyes widened as I saw the golden crust forming, a promise of crunch. The sound of the first sizzle was like applause from a hidden orchestra, announcing the birth of a new dish. My fingertips tingled with anticipation as the mixture cooled enough to shape, yet still warm enough to hold together. The texture was a paradox: soft inside, ready to burst into a crunchy halo when fried.
This version is a game‑changer because it takes the humble mash and gives it a bold personality. The cheese melts into a velvety layer that coats each patty like a secret sauce, while the green onions add a bright, almost citrusy zing. Breadcrumbs provide the crunch that shatters like thin ice when you bite, creating a satisfying contrast. I dare you to taste this and not go back for seconds; the combination of flavors will have you reaching for more. It’s the ultimate comfort food with a rebellious twist that feels both nostalgic and adventurous.
Now, here's the twist that will blow your mind: a splash of espresso grounds the flavor, adding depth without overpowering the creamy base. That small secret ingredient transforms the patties from ordinary to extraordinary, giving them a subtle, earthy undertone that lingers. The technique is simple—mix everything, shape into rounds, and let the pan do the rest. The result is a golden, crispy shell that hides a cloud of cheesy, buttery goodness. Let me walk you through every single step—by the end, you'll wonder how you ever made it any other way.
What Makes This Version Stand Out
- Taste: The combination of sharp cheddar and mellow potatoes creates a flavor profile that sings with every bite. The green onions add a bright, almost citrusy note that cuts through the richness. The result is a harmonious balance that feels both indulgent and wholesome.
- Texture: The patties boast a crisp exterior that shatters like thin ice, while the interior remains a fluffy, buttery cloud. The breadcrumb coating locks in moisture, preventing the mash from drying out during frying. The contrast between crunch and softness keeps diners coming back for more.
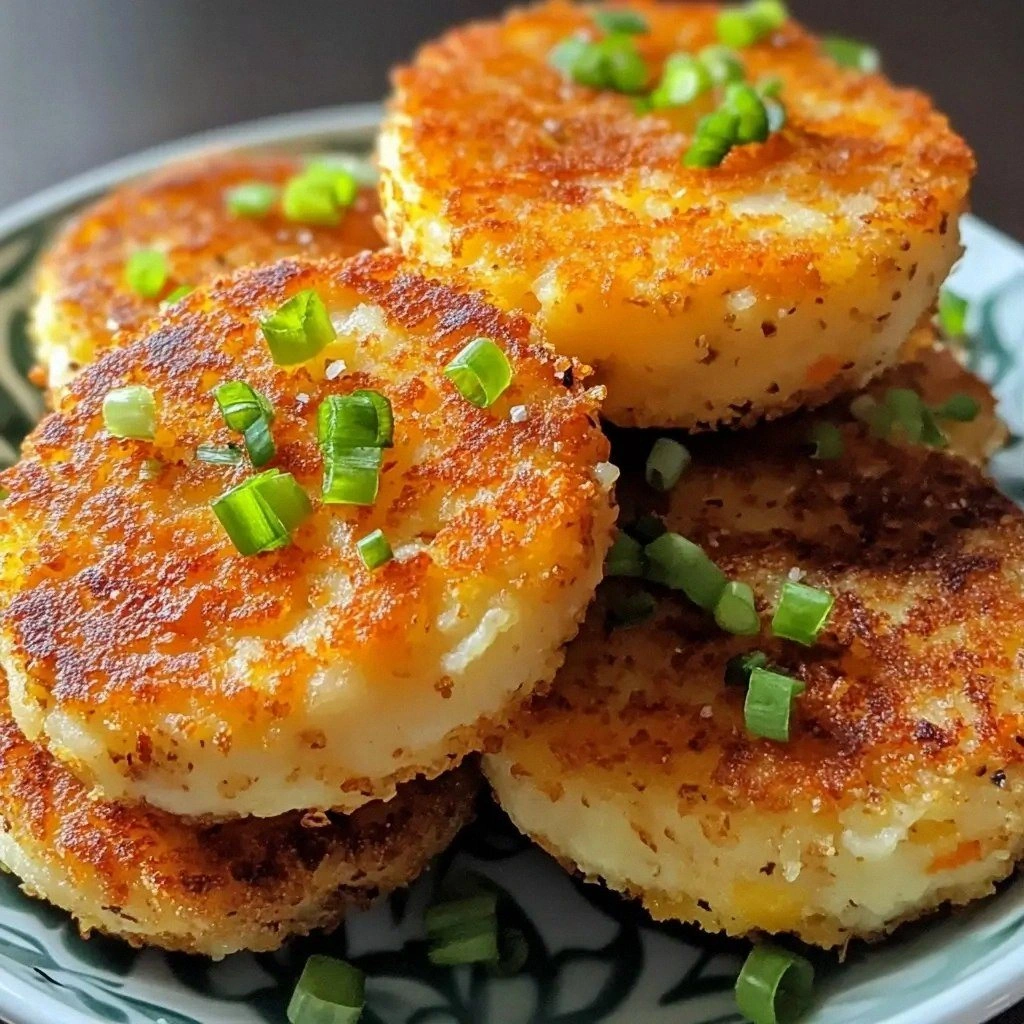
- Visual Appeal: Each patty is a golden masterpiece, with a glossy sheen that invites you to take a bite. The cheese melt creates a tempting, gooey halo that adds an extra layer of decadence. The green onion garnish adds a pop of color, making the dish look as good as it tastes.
- Convenience: The recipe is a breeze to assemble, taking less time than it takes to boil potatoes. It works great as a make‑ahead snack that can be frozen and reheated without losing quality. You can whip up a batch in minutes, making it ideal for last‑minute gatherings.
- Versatility: Serve them as a hearty appetizer, a side for a burger, or a base for a loaded nacho plate. They pair wonderfully with a tangy aioli, a smoky BBQ sauce, or a simple ketchup. The neutral flavor profile lets you experiment with different sauces and toppings.
- Ingredient Quality: Using fresh, high‑quality cheese and real, not instant, mashed potatoes elevates the dish. The breadcrumbs are homemade or lightly toasted for maximum flavor. Even the simplest ingredients shine when handled with care.
- Cooking Method: Pan‑frying at a moderate heat ensures an even, golden crust without burning the interior. The method is forgiving, so even beginners can achieve professional results. The technique is adaptable to both gas and electric stovetops.
- Make‑Ahead Potential: Prepare the patties ahead of time and freeze them flat, then reheat in a skillet or oven. The texture stays crisp, and the flavors remain fresh. This makes it a perfect recipe for meal prep or for entertaining guests on short notice.
Alright, let's break down exactly what goes into this masterpiece...
Inside the Ingredient List
The Flavor Base
Mashed potatoes are the soul of this dish, offering a buttery canvas that carries every other component. Freshly boiled, they should be silky smooth with no lumps; a grainy mash will break apart when fried. If you skip the potatoes entirely, the patties lose their signature comfort factor and become a bland breadcrumb ball.
Cheddar cheese is the star that melts into a glossy, savory coating. It also raises the protein content and adds a subtle sharpness that balances the earthiness of the potatoes. Swap cheddar for Gruyère or sharp Monterey Jack for a different flavor profile, but keep the melting quality.
The Texture Crew
Green onions bring a fresh, almost citrusy bite that brightens the dish. They also provide a slight crunch that contrasts with the softness of the mash. If you prefer a milder onion flavor, replace them with chives or thinly sliced scallions.
Breadcrumbs act as the structural glue, absorbing moisture and forming a crisp shell. Use panko for extra crunch or homemade breadcrumbs for a deeper flavor. Skipping breadcrumbs will result in a soggy patty that crumbles when you try to bite into it.
The Unexpected Star
The egg is the unsung hero that binds everything together, preventing the patties from falling apart during frying. It also adds a subtle richness and helps the breadcrumbs set into a firm coating. If you’re vegan, try a flaxseed egg or a splash of soy sauce to mimic the binding effect.
Oil for frying is essential for creating that coveted golden crust. Use a neutral oil with a high smoke point, such as canola or grapeseed, to avoid imparting unwanted flavors. If you prefer a healthier option, a light drizzle of olive oil will suffice, but the texture may be slightly softer.
The Final Flourish
Seasoning with salt and pepper is a must; they enhance every component without overpowering it. A pinch of smoked paprika can add a subtle depth, but keep the base seasoning simple to let the core flavors shine. Without proper seasoning, the dish will taste flat and uninspired.
Everything's prepped? Good. Let's get into the real action...
The Method — Step by Step
- First, boil the potatoes until tender, then mash them with butter, a splash of milk, salt, and pepper until they’re silky smooth. The mixture should feel like a soft, buttery cloud that’s easy to handle. Let it cool slightly so you can work with it without burning your fingers. If you’re in a hurry, use pre‑made mashed potatoes, but fresh is always superior. This step sets the foundation for the rest of the dish.
- Stir in the shredded cheddar, chopped green onions, breadcrumbs, and the egg, mixing until everything is evenly coated. The egg acts as a binder, keeping the mixture together. Use a whisk for a quick, uniform blend. If the mixture feels too sticky, add a tablespoon of breadcrumbs to firm it up. This is the moment where the flavors start to mingle.
- Let the mixture rest for about ten minutes; this allows the breadcrumbs to absorb moisture and the flavors to meld. While it rests, you can preheat your skillet. A rested mixture holds together better and yields a crispier crust. If you’re short on time, skip the rest—just be prepared for a slightly looser patty.
- Shape the mash into 1‑inch thick rounds using a spoon or your hands. The thickness ensures a golden crust while keeping the inside fluffy. Press them flat with a spatula to keep them from puffing up. If you prefer bite‑size patties, reduce the thickness to 0.5 inches. The shape dictates how the patty cooks and how it feels in your mouth.
- Heat oil in a large skillet over medium heat (around 350°F). Use enough oil to cover the bottom of the pan, creating a shallow pan‑fry. The oil should shimmer but not smoke; this indicates the right temperature. Once hot, carefully slide in a patty, pressing gently to keep it flat. The sizzle that follows is the promise of a golden crunch.
- Fry the patties in batches, pressing gently with a spatula to keep them flat. Flip after 3–4 minutes on each side, until golden brown and crisp. Avoid overcrowding to maintain even cooking. If you notice oil splattering, keep a lid nearby and wear oven mitts. This step is the moment of truth where the patty’s fate is sealed.
- Remove patties and drain on paper towels to absorb excess oil. Let them rest for a minute; this locks in moisture and keeps the interior tender. If you’re making a large batch, keep the cooked patties warm in a low‑heat oven (200°F) to prevent them from drying out. The rest period is essential for a moist, flavorful bite.
- Serve immediately with your choice of dipping sauce—an aioli, a smoky BBQ sauce, or a simple ketchup. The hot patty pairs beautifully with a cool, creamy dip, creating a contrast that elevates the whole experience. If you prefer a slightly different texture, finish the patties in the oven at 400°F for 5 minutes to crisp the tops further. The result is a uniform, golden finish that’s irresistible.
That's it — you did it. But hold on, I've got a few more tricks that'll take this to another level...
Insider Tricks for Flawless Results
The Temperature Rule Nobody Follows
Many cooks fry at a high heat, but that often burns the exterior while leaving the inside soggy. The secret is to maintain a steady medium heat—around 350°F—so the patty cooks evenly and develops a golden crust. If you’re using a gas stove, keep the flame low and let the skillet heat gradually. This technique ensures a crisp edge without compromising the fluffy interior.
Why Your Nose Knows Best
Before you flip a patty, take a moment to smell the aroma. A rich, buttery scent that’s slightly nutty signals that the crust is ready. If the smell is too oily or metallic, give it a little more time. Your nose is the best judge of doneness, and it’s always right.
The 5-Minute Rest That Changes Everything
After frying, let the patties rest on a rack for five minutes. This rest allows the steam to redistribute, keeping the interior moist while the crust stays crisp. A friend once skipped this step and ended up with a dry, crumbly patty—lesson learned. The rest period also lets the flavors settle, making each bite more cohesive.
Use a Skillet, Not a Pan
A heavy‑bottomed skillet distributes heat evenly, preventing hot spots that can burn the patties. Cast iron or stainless steel works best. Avoid non‑stick pans; they can leave a residue that alters the flavor. A proper skillet ensures a uniform, golden finish.
Keep It Flat, Keep It Crispy
Press each patty gently with a spatula during frying; this keeps the shape flat and increases surface area for crisping. If you let them puff up, the interior may stay soft while the exterior burns. A flat patty also makes for an easier bite and a better presentation.
Serve Immediately, Don’t Let Them Sit
Once cooked, serve the patties right away to enjoy the contrast of hot, crispy exterior and warm, gooey interior. If you must hold them, place them on a wire rack over a sheet of parchment to keep the bottom from getting soggy. The moment they hit your plate is the moment they shine.
Creative Twists and Variations
This recipe is a playground. Here are some of my favorite ways to switch things up:
Cheesy Jalapeño Kick
Add diced jalapeños and a sprinkle of pepper jack cheese to the mash. The heat from the jalapeños pairs with the sharpness of pepper jack, creating a spicy, melty experience. Ideal for game‑night parties where bold flavors rule.
Herbed Mediterranean Flair
Replace cheddar with feta and stir in chopped sun‑dried tomatoes, oregano, and a splash of olive oil. The tangy feta and aromatic herbs give the patties a Mediterranean vibe. Pair with tzatziki for a fresh, cool contrast.
Mexican Street Tacos
Shape the patties into small rounds and serve them in soft tortillas with avocado, salsa, and a squeeze of lime. The mash provides a comforting base that balances the zesty toppings. A crowd‑pleaser for any taco night.
Vegan Delight
Use a flaxseed egg or mashed chickpeas as the binder, and swap cheddar for nutritional yeast. The result is a vegan patty that still delivers a cheesy, umami flavor. Serve with a cashew‑based dip for extra creaminess.
Breakfast Breakfast
Add a dash of cinnamon and a spoonful of maple syrup to the mash before shaping. The sweet notes transform the patties into a breakfast treat, perfect with a side of scrambled eggs. It’s a sweet‑savory surprise that will win over any skeptic.
Asian Fusion
Stir in finely chopped scallions, a splash of soy sauce, and a pinch of sesame oil. The umami and nutty flavors give the patties an Asian twist. Serve with a drizzle of sriracha mayo for an extra kick.
Storing and Bringing It Back to Life
Fridge Storage
Store cooked patties in an airtight container in the refrigerator for up to 3 days. Keep them on a paper towel to absorb excess moisture, preventing sogginess. When ready to serve, reheat in a skillet over medium heat until warmed through.
Freezer Friendly
Freeze uncooked patties on a parchment‑lined tray until solid, then transfer them to a freezer bag. They’ll stay fresh for up to 2 months. When you’re ready to cook, simply fry them directly from frozen; no defrosting needed. The texture remains crisp and flavorful.
Best Reheating Method
Reheat frozen or refrigerated patties in a skillet with a splash of oil, or in a preheated oven at 375°F for 10 minutes. Add a tiny splash of water before reheating, then cover the skillet with a lid to create steam, restoring moisture. The result is a patty that feels almost freshly fried.