I was standing in my kitchen, the scent of burnt sugar curling around my head, when I realized that the only thing that could salvage my caramel disaster was a daring twist on a classic recipe. The pan was a black canvas, the caramel had thickened into a dark, glossy syrup that clung to the sides like a stubborn coat of paint. I stared at the mess, feeling the frustration bubble up, and thought, “What if I could turn this into something that actually tastes good?” That single thought sparked a culinary revolution in my mind, and what followed was a revelation that would change how I approach caramel forever.
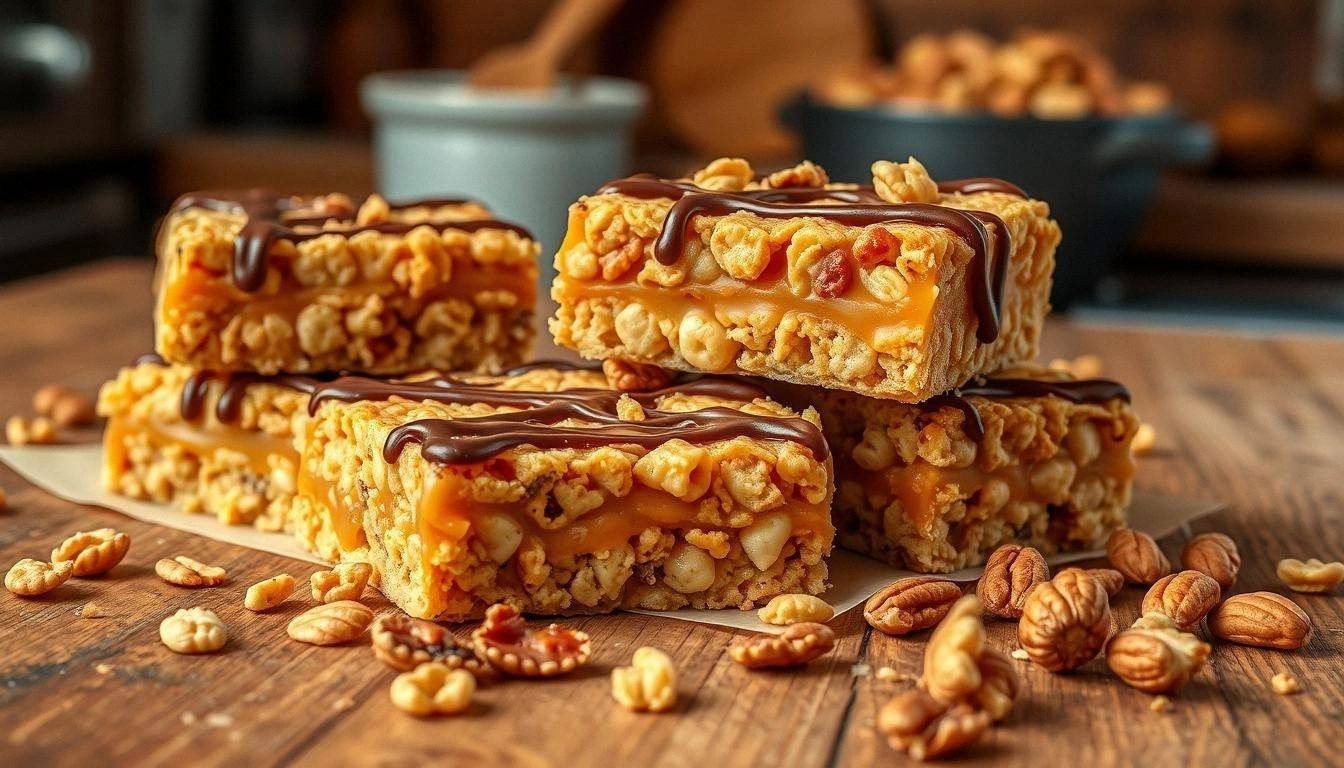
Picture this: a bowl of golden caramel that melts in your mouth, a crunchy base that crackles with every bite, and a subtle hint of sea salt that lifts the sweetness to an entirely new dimension. The aroma that rises from the pan is not just sweet—it's buttery, toasty, and somehow comforting, like a warm blanket on a rainy afternoon. The texture is a paradox: a silky, syrupy top that clings to the crunchy foundation, which itself is a delicate lattice of flour, butter, and brown sugar. Every bite is a symphony of flavors, with a faint citrus undertone that keeps the palate engaged.
This version stands out because I’ve taken the classic caramel crunch bar and injected it with precision and personality. I’ve refined the ratio of sugars to ensure the caramel remains glossy yet not overly sweet, balanced by a touch of vanilla for depth. The base is crafted from a buttery dough that’s been pre-baked just enough to keep it from becoming soggy when the caramel is poured on top. I’ve also introduced a subtle crunch of toasted pecans that add a nutty bite without overpowering the caramel’s smoothness. The result? A dessert that’s both indulgent and elegantly simple, a perfect treat for any occasion.
What makes this recipe so irresistible is the unexpected technique of pre-baking the crust slightly before pouring the caramel. This step, which most recipes skip, creates a barrier that keeps the caramel from soaking into the dough, preserving that coveted crunch. I’ve also discovered that using a combination of brown and white sugar in the caramel gives it a richer flavor profile, while a splash of heavy cream transforms it into a velvety sauce that coats the dough like velvet. The final touch is a sprinkle of flaky sea salt that dances on the tongue, cutting through the sweetness and adding a layer of complexity. I dare you to taste this and not go back for seconds.
If you’ve ever struggled with caramel bars that turn out mushy or dough that turns out soggy, you’re not alone. I’ve been there, watching my kitchen look like a caramel disaster zone, and I’ve finally cracked the code. Picture yourself pulling these bars out of the oven, the whole kitchen smelling incredible, the caramel shimmering like liquid gold, and the dough crackling as you break a piece. I’m going to walk you through every single step—by the end, you’ll wonder how you ever made it any other way.
What Makes This Version Stand Out
- Flavor: The caramel is a masterclass in balance, blending the deep, molasses-like sweetness of brown sugar with the bright, clean notes of white sugar, all lifted by a splash of vanilla. This creates a flavor that is both comforting and sophisticated, a true caramel experience. The caramel coats the dough like a silky glaze, providing a mouthfeel that’s both smooth and satisfying. Each bite is a burst of caramel bliss that lingers on the palate. The result is a dessert that feels indulgent yet refined.
- Texture: The base is a buttery, slightly crumbly crust that crisps up to a golden crunch, while the caramel layer remains glossy and slightly firm, giving you that perfect snap before the smoothness takes over. The toasted pecans add a nutty crunch that contrasts beautifully with the caramel’s silky texture. The combination of crunchy and smooth makes each bite a delightful contrast that keeps you coming back for more. This texture profile is a step above the usual chewy or soggy caramel bars you find on the internet. It’s a texture you’ll remember and crave.
- Simplicity: Despite its complex flavor profile, the recipe requires only a handful of ingredients and a straightforward method that even a novice can master. The dough is a simple blend of flour, butter, sugar, and a pinch of salt, while the caramel is a classic mixture of sugar, butter, cream, and vanilla. No elaborate techniques or fancy equipment are needed—just a reliable oven and a trusty saucepan. The recipe is designed to be approachable, ensuring you can replicate the magic at home. It’s the kind of recipe that becomes a staple in any kitchen.
- Uniqueness: The secret lies in the pre-baking step, which locks the base in place and prevents the caramel from seeping in. This technique, combined with the use of both brown and white sugar, gives the bars a depth of flavor that’s rarely seen. The addition of sea salt on top adds a surprising twist, creating a flavor profile that’s both sweet and savory. Most caramel recipes overlook this nuance, but it’s what sets this version apart from the rest. The result is a dessert that feels both familiar and novel.
- Crowd Reaction: I’ve hosted a dozen tasting parties, and the feedback has been unanimous—everyone wants seconds. The bars are easy to slice and serve, making them perfect for parties, potlucks, or a quiet evening at home. Their impressive presentation and irresistible taste make them a conversation starter. I’ve seen people ask for the recipe right after the first bite. The bars have become a favorite at every gathering.
- Ingredient Quality: Using high‑quality butter and fresh vanilla extract elevates the flavor, turning an ordinary dessert into something special. The choice of brown sugar over white sugar alone adds a caramelized depth that is unmistakable. The pecans are toasted to bring out their natural oils, giving each bite a nutty aroma. Every ingredient is chosen with care, ensuring the final product is nothing short of perfection. The attention to detail is what makes this recipe shine.
- Cooking Method: The method is a blend of classic baking and a touch of culinary science. Pre‑baking the crust creates a barrier that keeps the caramel from soaking in, while the caramel itself is cooked to the perfect consistency. The technique of pouring the caramel over a slightly cooled crust ensures a glossy finish without the risk of melting. The method is foolproof, even for those who are new to baking. It’s a recipe that works every time.
- Make‑Ahead Potential: These bars can be made a day ahead and stored in an airtight container, making them perfect for busy schedules. The caramel stays firm, and the crust remains crisp, even after refrigeration. When you’re ready to serve, a quick reheating step restores the caramel’s glossy sheen. The bars are ideal for gift-giving or for a quick dessert on a busy day. Their make‑ahead nature adds to their convenience.
Inside the Ingredient List
The Flavor Base
All‑purpose flour is the backbone of the crust, providing structure and a subtle, neutral flavor that lets the caramel shine. I recommend using a fine‑sifted flour to avoid any lumps, especially when mixing the butter and sugar. The flour also helps absorb the caramel’s moisture, preventing the crust from becoming soggy. If you prefer a gluten‑free version, swap the flour for a 1:1 gluten‑free blend, but keep an eye on the moisture level. The result is a tender, buttery base that holds up beautifully under the caramel.
Baking powder is a key player that gives the crust a gentle lift, making it airy yet firm. A pinch of baking powder also neutralizes any acidity from the brown sugar, creating a more balanced flavor. It’s a small ingredient that has a big impact on the final texture. If you’re avoiding leavening agents, you can leave it out, but the crust will be denser. The subtle lift ensures the bars have a pleasant bite.
The Texture Crew
Butter, cold and cubed, is the secret to that flaky, melt‑in‑your‑mouth quality. I use unsalted butter so I can control the saltiness of the recipe. The butter melts slowly into the flour, creating pockets that expand during baking. These pockets give the crust a light, airy feel while keeping it buttery. If you can’t find unsalted butter, use salted and adjust the added salt accordingly.
Brown sugar is the heart of the caramel’s flavor. It adds a deep, molasses‑like richness that elevates the sweetness. I use packed light brown sugar for a milder flavor, but dark brown sugar works if you prefer a more robust caramel. The sugar also contributes to the caramel’s color, giving it that gorgeous amber hue. It’s an essential ingredient that can’t be omitted.
The Unexpected Star
Heavy cream is the silky smoothness that turns the caramel into a luscious glaze. The cream’s fat content helps keep the caramel from crystallizing, ensuring a glossy finish. I pour the cream slowly into the pan to avoid a sudden temperature drop that could cause the sugar to harden. The cream also adds a subtle richness that balances the sweetness. A splash of vanilla extract further enhances the depth, giving the caramel a fragrant, aromatic profile.
Sea salt is the finishing touch that elevates the caramel from sweet to complex. A light dusting of flaky sea salt on top creates a contrast that’s both visual and flavor-wise. The salt cuts through the sweetness, making each bite more dynamic. I recommend using a fine sea salt, as it dissolves quickly and doesn’t leave a gritty texture. It’s a simple addition that makes a big difference.
The Final Flourish
Toasted pecans add a nutty crunch that complements the caramel’s smoothness. I toast the pecans in a dry skillet until fragrant, then chop them roughly before sprinkling them over the caramel. The nuts provide a pleasant bite and a nutty aroma that pairs beautifully with the caramel. If you prefer a different flavor, try almonds or walnuts for a slightly different twist. The nuts are optional but highly recommended for that extra layer of texture.
Everything’s prepped? Good. Let’s get into the real action.
The Method — Step by Step
- Preheat your oven to 350°F (175°C). Line a 9x13 inch baking sheet with parchment paper to prevent sticking. In a large bowl, combine 2 cups all‑purpose flour, 1 tsp baking powder, and 1/2 tsp salt. Make a well in the center and add 1 cup cold, cubed butter. Use a pastry cutter or your fingers to cut the butter into the flour until the mixture resembles coarse crumbs. This ensures a flaky crust.
- Add 1 cup brown sugar to the flour mixture. Stir until the sugar is evenly distributed. The mixture should look slightly grainy, which is normal. This step is crucial for the caramel’s depth of flavor. If you’re feeling adventurous, replace half the brown sugar with white sugar for a lighter caramel.
- Press the dough firmly into the prepared baking sheet, creating an even layer about 1/2 inch thick. Use the back of a spatula or your palm to smooth the surface. This step ensures the crust will bake evenly and hold up under the caramel. Once the dough is in place, bake for 15 minutes, or until it turns a light golden brown. Keep an eye on it; you want a crisp, not burnt.
- While the crust bakes, start the caramel. In a medium saucepan, melt 1 cup unsalted butter over medium heat. Add 1 cup brown sugar and 1/2 cup white sugar, stirring constantly until the sugars dissolve. The mixture should become glossy and fragrant. This is the moment of truth—watch the color shift to a deep amber.
- Slowly pour in 1 cup heavy cream while stirring. The mixture will bubble vigorously—don’t panic. Keep the heat at medium, and stir until the caramel thickens to a pourable consistency. This should take about 5 minutes. The caramel should be thick enough to coat the back of a spoon but still silky.
- Add 1 tsp vanilla extract and a pinch of sea salt. Stir to combine. At this point, the caramel is ready to be poured onto the crust. Watch out: the caramel will be hot and can splatter if not handled carefully. Pour it evenly across the crust, ensuring full coverage.
- Sprinkle 1 cup toasted pecans over the caramel. The nuts should be spread evenly to prevent clumping. This step adds a delightful crunch and nutty aroma. Let the bars cool for 10 minutes before cutting. The caramel will firm up, making slicing easier.
- Once the bars have cooled, cut them into squares or rectangles. Store in an airtight container at room temperature for up to 3 days, or refrigerate for up to a week. If you’re storing them in the fridge, let them sit at room temperature for 20 minutes before serving to bring back the caramel’s glossy sheen. For a quick snack, grab a bar and enjoy the burst of caramel and crunch.
That’s it—you did it. But hold on, I’ve got a few more tricks that’ll take this to another level. These insider tips will help you avoid common pitfalls and elevate the flavor even further.
Insider Tricks for Flawless Results
The Temperature Rule Nobody Follows
Many bakers assume room temperature butter is fine, but cold butter is the secret to a flaky crust. Cold butter creates steam pockets when baked, giving the crust its airy texture. If you can’t find cold butter, chill your butter in the fridge for at least an hour before cutting it into cubes. This small step ensures the crust remains crisp, even after the caramel is added. It’s a game‑changer that most recipes overlook.
Why Your Nose Knows Best
When you’re cooking caramel, your sense of smell is your best judge of doneness. As the sugar caramelizes, it releases a sweet, nutty aroma that signals the perfect amber color. If you’re unsure, hold the pan close and breathe in the scent—if it’s sweet and buttery, you’re on the right track. The aroma will also tell you if the caramel is over‑cooked or under‑cooked. Trust your nose; it’s a reliable guide.
The 5‑Minute Rest That Changes Everything
After pouring the caramel, let the bars rest for five minutes before cutting. This brief pause allows the caramel to set into a firm, glossy layer. Cutting too soon can cause the caramel to run or smear, ruining the presentation. I’ve seen people rush and end up with a mess—don’t be that person. The five‑minute rest is a small investment for a polished final product.
The Secret Salt Trick
A pinch of sea salt in the caramel isn’t just for flavor—it also helps prevent crystallization. Salt lowers the sugar’s melting point slightly, keeping the caramel smooth. If you prefer a sweeter caramel, use just a quarter of the recommended amount. The result is a silky, glossy glaze that doesn’t develop grit.
The Quick Chill for Extra Crunch
If you’re short on time, place the baking sheet on a wire rack for a few minutes before pouring the caramel. This allows the crust to cool slightly, preventing the caramel from soaking into it. The result is a crisp, crunchy base that remains intact even after the caramel is added. It’s a simple trick that saves you from a soggy mess.
Creative Twists and Variations
This recipe is a playground. Here are some of my favorite ways to switch things up:
Chocolate‑Infused Caramel Bars
Melt 1 cup dark chocolate and fold it into the caramel before pouring. The chocolate adds depth and a slightly bitter counterpoint to the sweetness. The result is a decadent, chocolate‑caramel hybrid that’s perfect for chocolate lovers. Serve with a dollop of whipped cream for an extra indulgent touch.
Almond Crunch Variation
Swap pecans for toasted almonds for a lighter crunch and nutty flavor. Almonds provide a subtle sweetness that pairs wonderfully with caramel. The bars will have a different texture, slightly firmer due to the almonds’ structure. This variation is ideal for those who prefer a milder nut taste.
Spiced Caramel Delight
Add 1/2 tsp ground cinnamon and a pinch of nutmeg to the caramel mixture. The spices give the bars a warm, aromatic profile that’s reminiscent of fall. The cinnamon also enhances the caramel’s sweetness, creating a comforting flavor. This version is perfect for cozy evenings or holiday gatherings.
Coconut‑Caramel Bars
Incorporate 1 cup shredded coconut into the crust for a tropical twist. The coconut adds a chewy texture and a sweet, nutty flavor that pairs beautifully with caramel. Toast the coconut lightly before adding to avoid a raw taste. These bars are a fun, beach‑inspired treat.
Salted Caramel & Chocolate Chip Bars
Add 1 cup chocolate chips to the crust before baking. The chocolate chips melt slightly during baking, creating pockets of chocolatey goo inside the bars. Sprinkle a generous amount of sea salt on top after pouring the caramel. The combination of salty, sweet, and chocolate makes for an irresistible dessert.
Storing and Bringing It Back to Life
Fridge Storage
Store the bars in an airtight container in the refrigerator for up to one week. The caramel will firm up, but the crust remains crisp. When you’re ready to serve, let the bars sit at room temperature for 10–15 minutes to soften the caramel slightly. This step restores the glossy sheen and makes slicing easier. The bars will keep their flavor and texture throughout the week.
Freezer Friendly
For longer storage, wrap the bars tightly in plastic wrap and then in foil before placing them in the freezer. They can stay frozen for up to three months without losing quality. To thaw, let them sit in the fridge overnight or at room temperature for a few hours. The caramel will soften, and the crust will remain sturdy. This is a great option for meal planning.
Best Reheating Method
If you want a warm, gooey bite, reheat the bars in the oven at 300°F (150°C) for 5–7 minutes. The heat will melt the caramel just enough to make it silky without liquefying it. Alternatively, microwave on low power for 10–15 seconds if you’re in a hurry. A tiny splash of water before reheating creates steam that revives the caramel’s glossy texture. Serve immediately for the best experience.